7 Easy Kraft Paper Gift Wrapping Ideas for Beautiful Handmade Presents

7 Easy Kraft Paper Gift Wrapping Ideas for Beautiful Handmade Presents
Looking for beautiful ways to wrap gifts without buying a different roll of patterned paper for every occasion? These seven kraft paper gift wrapping ideas use simple string, ribbon, tags and small decorative touches to make ordinary boxes feel thoughtful. You will learn how to wrap neatly, add color without clutter and reuse supplies where practical. Each idea is shown with a genuine photograph, followed by steps you can adapt for birthdays, thank-you presents or the winter gift-giving season. Skip to the first idea, or use the contents list below to choose your favorite.
In This Article
- 1. Tie Plain Kraft Paper With Natural Twine
- 2. Add a Red Ribbon for a Bold, Simple Contrast
- 3. Personalize the Package With a White Gift Tag
- 4. Tuck a Small Pine Sprig Under the String
- 5. Use a Thin Gold Ribbon for a Polished Finish
- 6. Finish a White-String Wrap With a Red Seal Accent
- 7. Make a Coordinated Set With Mixed Twine and Tags
1. Tie Plain Kraft Paper With Natural Twine

The photograph shows a rectangular parcel wrapped in brown paper and secured with a simple piece of natural twine. That uncluttered look is one of the easiest kraft paper gift wrapping ideas to recreate with materials you may already own. Start with a box rather than an awkwardly shaped item if you are new to gift wrapping. Lay the box face down on a sheet of paper, check that the long edges overlap slightly, and leave enough paper at each end to fold the flaps neatly over the box. Cut only after doing a test fold to avoid wasting a short sheet. Secure the main seam with a small amount of tape if needed, then bring the twine around the package in a cross and tie a snug bow on top. The string should hold the paper without digging into a soft or fragile gift. A single strand looks understated; two neat passes add detail without the bulk of a store-bought bow. If the paper tears, reinforce the fold discreetly rather than covering the parcel with more decoration. This style works for birthdays, thank-you gifts and winter celebrations, and the twine can sometimes be saved and reused if removed carefully.
2. Add a Red Ribbon for a Bold, Simple Contrast

In the photo, two kraft-paper presents are finished with bright red ribbons. The contrast between the brown paper and the red fabric makes the decoration stand out even though the base wrapping is simple. To make a similar gift, wrap your box first and turn the taped seam to the back. Cut a length of ribbon that reaches around the box with enough left for a bow; the amount depends on the dimensions of your gift and the fullness of the bow you want. Lay the ribbon flat as you bring it around the parcel, cross it once if you want a traditional look, and pull the loops even before tightening. Smooth satin can slip, so a small piece of removable tape underneath the ribbon may help while you tie it. Reuse a ribbon from an earlier present when it is still in good condition instead of buying a new spool for one package. For an understated variation, choose burgundy or a narrow cotton ribbon. The photo’s red accent provides the idea, not a requirement to match its exact shade. Keep delicate ribbons away from small children who might pull them loose, and remove any reusable ribbon before putting the paper in the recycling stream.
3. Personalize the Package With a White Gift Tag

The photograph features a brown-paper gift with a small white tag, showing how a plain label can become the main visual detail. A tag is also practical when you are preparing several gifts and do not want to mix them up. Cut a rectangle from sturdy white paper, a spare greeting card or a clean piece of cardboard packaging. Round the corners if you like, punch a small hole near the top and thread through a short piece of string. Write the recipient’s name clearly, then add a brief message such as “Made with love” only if it suits the occasion. Choose a marker that will not bleed through the paper, and test it on a scrap before writing. Attach the tag to the wrapping string or ribbon rather than sticking it directly across a box-opening seam, so the recipient can remove it easily. The photo shows a white tag, but the method works with cream, pale pink or recycled brown card as well. If you want more inexpensive card-cutting and folding projects, explore our easy paper crafts for beginners. A thoughtful label often contributes more than several extra decorations.
4. Tuck a Small Pine Sprig Under the String

The image shows a kraft-wrapped present with a green pine sprig placed on top. It is a simple example of using one botanical detail rather than covering a gift with lots of plastic ornaments. To borrow the look, first secure the wrapping paper and tie a narrow length of twine around the box. Select a small, clean sprig from a suitable source and place its stem beneath the knot so that the greenery points along the parcel instead of sticking out into the recipient’s face. Trim any prickly or awkward ends with appropriate scissors, and avoid wet or sap-heavy foliage that might stain the paper. If the package needs to travel for several days, a reusable artificial sprig or a dried botanical may be more dependable than fresh greenery. Do not use unidentified or potentially toxic plants around children or pets, and keep any sharp decorative wire ends covered. The picture features pine specifically; there is no need to claim that another plant is pictured. This is a lovely option for a winter gift, but the general technique also works with safe dried flowers or a simple paper leaf for other seasons. For craft inspiration involving pressed botanicals, see our pressed flower crafts guide.
5. Use a Thin Gold Ribbon for a Polished Finish

The gift in this photograph is wrapped in brown paper and accented with a gold ribbon. The shine of the ribbon provides a dressier finish without changing the inexpensive paper underneath. Choose a narrow gold ribbon if your gift is small, or a slightly wider one if it is a larger box. Once the kraft-paper folds are neat, place the gift face up and run the ribbon across the middle before bringing it underneath the box and back to the top. Make a small bow, a flat knot or a tidy band depending on the shape of the parcel. For a cleaner look, keep the ribbon centered and trim the ends evenly with sharp scissors. If the ribbon is wired or metallic, avoid scraping delicate hands and be mindful of sharp edges. You can get a similar effect with cream-colored cotton tape and a small gold paper tag if you prefer not to use shiny material. The photo is a good reminder that you do not need multiple colors, bows and tags on every box: one deliberate accent usually looks more intentional. Set aside intact ribbons after unwrapping, as ribbons are generally not accepted in ordinary curbside paper recycling.
6. Finish a White-String Wrap With a Red Seal Accent
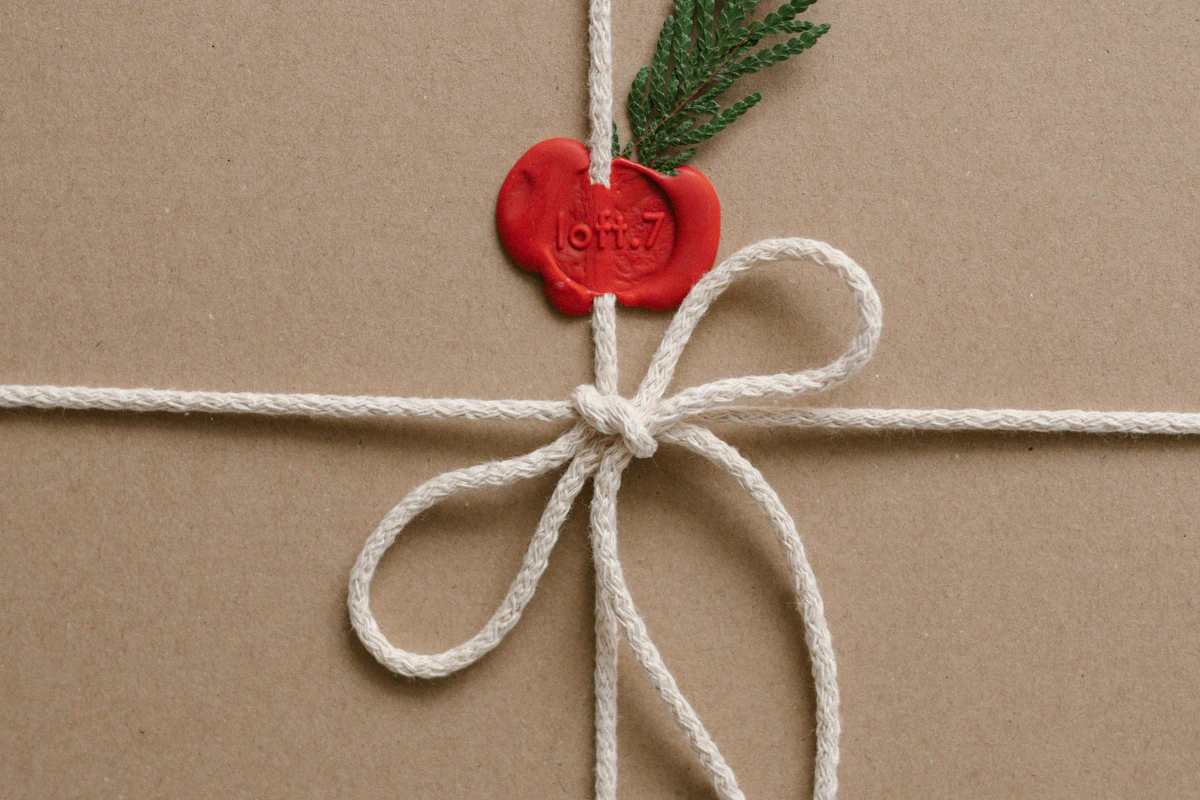
The photograph shows a kraft-paper box tied with white string and finished with a red seal. This style gives the parcel a vintage, stationery-inspired detail while staying within a limited palette. Start by wrapping a firm box and securing the string so the knot stays in place. For the easiest version, use a premade adhesive wax-seal-style sticker on a small paper tag or onto the outer wrap where it will not hold the box shut. That gives a similar visual effect without the heat or dripping involved in melting sealing wax. If an experienced adult chooses to make a traditional wax seal, follow the product’s fire and heat-safety instructions, work on a heat-resistant surface and keep the tools away from children; the hot wax can burn skin or damage packaging. A flat sticker is a better choice for gifts that will be packed tightly in shipping boxes, because raised decorative seals can break in transit. The white string in the photo also shows why limited contrast works: the eye goes straight to the single red accent. Add the recipient’s name on the reverse of the tag so the design remains clean but the package is still easy to identify.
7. Make a Coordinated Set With Mixed Twine and Tags
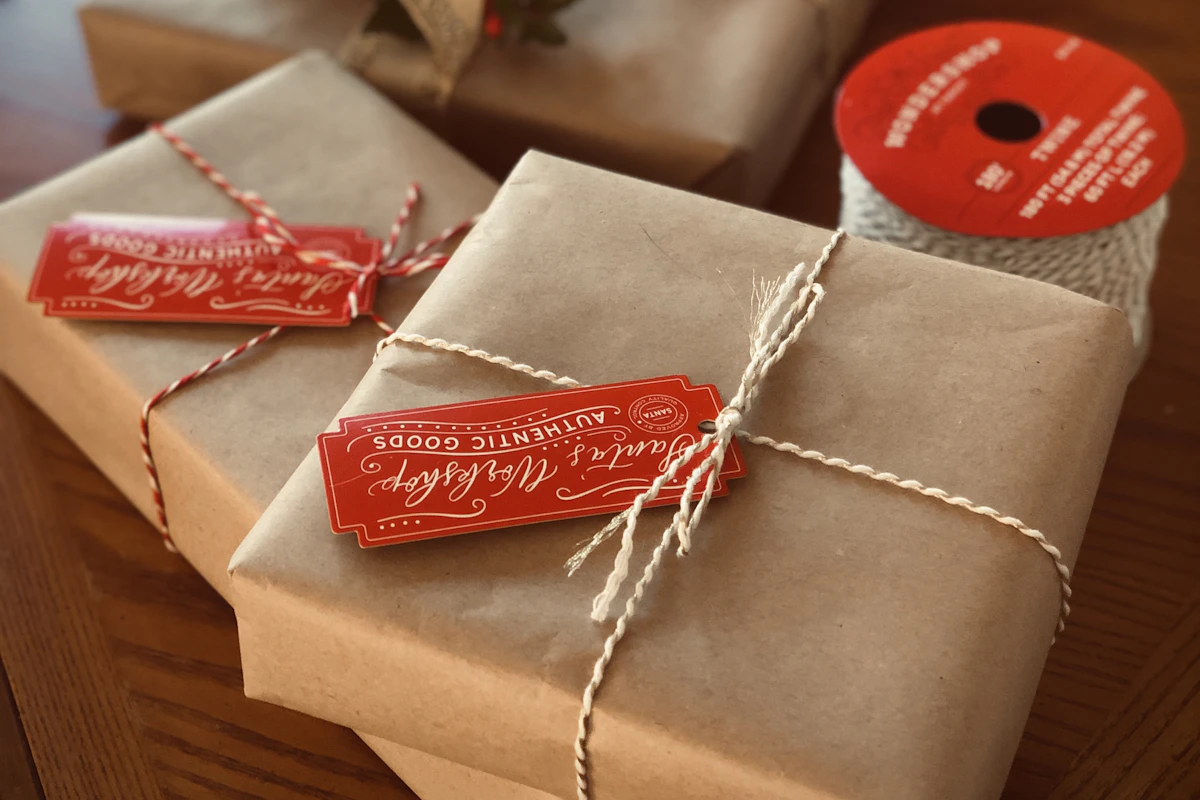
The final photograph shows several brown-paper gifts styled together, using white and gold string, a seasonal gift tag and a little greenery. It illustrates how simple materials can look cohesive across a group of presents without every box being identical. Choose one neutral paper as the shared base, then limit yourself to two string colors and one style of tag. For example, tie a small square box with white cotton string, a taller box with natural twine and another package with a narrow gold accent. Place names on the tags before stacking the presents so each gift has a clear destination. Vary the tie direction to suit the shape of the boxes but repeat a few colors or materials so the group feels intentional. The holiday tag shown in the photograph can be replaced with a plain birthday or thank-you tag for a different occasion; do not assume that the same wording suits every recipient. If you choose greenery like the pictured sprigs, keep it small and easy to remove, and make sure the packaging remains practical to carry. This method works particularly well when preparing teacher gifts, family presents or small party favors on a budget. Save leftover twine and reusable tags in a small envelope so you can use them in another wrapping session.
Practical Tips Before You Wrap
Start with the supplies you already have: plain kraft paper, scissors, tape, a ruler, string or ribbon, and a pen. You can add gift tags, a paper seal or one safe botanical detail, but none of those extras are necessary for a neat wrap. Prepare all boxes on a clean, flat surface before cutting paper.
- Test the paper length first: Hold the sheet around the entire box before trimming. Leave enough overlap for a secure seam and enough depth at the short ends to make clean triangular folds.
- Keep the decoration removable: A tied ribbon or tag is easier to save than a bow glued permanently to the paper.
- Make the tag readable: Write the recipient’s name before tying the final knot so you do not have to undo a finished parcel.
- Choose safe toppers: Avoid sharp wires, loose tiny decorations or unsuitable plants on gifts intended for children or pets.
- Do not promise everything is recyclable: Plain paper may be accepted locally, but foil, glitter, plastic coatings and many ribbons are not. NH Recycles’ gift-wrapping guidance advises checking local rules and saving reusable materials where possible.
- Save leftovers: Keep offcuts for tags and small packages, and store usable ribbon loosely instead of crushing it into a drawer.
Final Thoughts
Good gift wrapping does not require a cupboard full of supplies. The packages in these photographs use many of the same simple materials, yet the result changes with a different knot, color, tag, greenery or seal. Try one kraft paper idea first, pay attention to how easily the gift opens and travels, and reuse any ribbons or tags that remain in good condition. Thoughtful details and practical construction matter more than buying elaborate decorations.
Useful Resources and Photo Credits
- Pinterest Newsroom: Holiday Ideas People Are Searching For (November 2026) — current evidence of interest in distinctive gift presentation; Pinterest trends are not Google search-volume data.
- Farmers’ Almanac: Inexpensive Gift Wrapping Ideas — ideas for using simple materials and thoughtful handmade details.
- NH Recycles: Holiday Gift Wrapping — local recycling and reuse guidance.
- Unsplash License — license for freely downloadable images used in this article.
- Original photograph credits: Jess Bailey; Natalia Arkusha; Cemrecan Yurtman; Kostiantyn Li; Fiona Murray-deGraaff; Jess Bailey; Raymond Petrik; Erica Marsland Huynh. Every photo is an original licensed photograph that has been cropped to a matching landscape 3:2 ratio.
You May Also Like

Crafts
7 Easy Paper Crafts for Beginners (Beautiful DIY Ideas)
Explore more beginner-friendly projects that turn everyday paper and basic tools into useful handmade designs.